The table block is an effective tool for displaying structured information, making it easier to compare and analyze content.
When to use the table block
To organize data:
Use tables to present structured content that allows for easy comparison/correlation.
Comparison tasks:
If users need to compare adjacent content quickly.
Example: Spring Registration Schedule
| Date | Undergraduate | Graduate |
|---|---|---|
| November 6, 2024 | Continuing & Professional Studies | Continuing & Professional Studies Engineering Engineering Sever Institute |
| November 7, 2024 | Arts & Sciences Sam Fox Master of Public Health – 2nd & 3rd Year Non-MD WUSM programs | |
| November 8, 2024 | Class of 2025 or Earlier | Master of Social Work – 2nd & 3rd Year |
| November 11, 2024 | Class of 2026 | |
| November 12, 2024 | Class of 2027 | Master of Public Health – 1st Year |
| November 13, 2024 | Class of 2028 | Master of Social Work – 1st Year |
When not to use the table block
Non-tabular information:
Do not use tables for layout designs or lists; opt for the listing block or list block instead.
Wordy content:
For lengthy text or narratives, use traditional headings and paragraphs.
Better visualization needed:
If the data is best represented as a chart or infographic, choose those formats instead.
Best practices
Clear headers:
Always set the top row as the header and use concise labels.
Minimize columns:
Limit the number of columns to enhance readability.
Avoid empty cells:
Don’t leave header cells empty; use appropriate placeholders instead.
Usability
Mobile experience:
Tables may not display well on mobile devices, potentially leading to a poor user experience.
Cluttered appearance:
Excessive text can make tables hard to read. Keep entries concise.
Accessibility issues:
Complex tables can confuse users of assistive technologies if not formatted correctly.
How to add a table block
- In the Page Editor, navigate to the area of the page where you want the block to display.
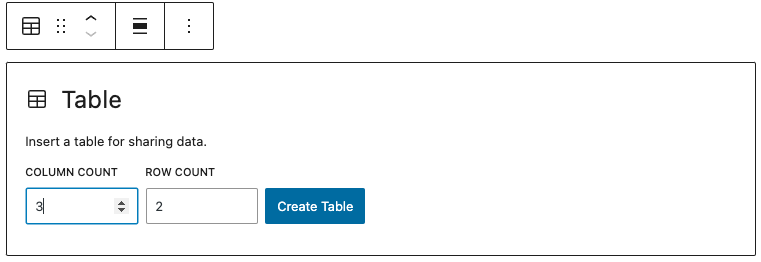
- Click on the Add block icon [+] and select/search for Table from the block menu.
- By default, the column count will be populated with 3 and the row count will be populated with 2. Make any necessary adjustments and click Create Table.
- Type your content in the table cells.
- To edit the number of columns and rows, click anywhere in the table area to activate the table editor. Click Edit table icon (four-square grid).
- Click Update in the upper right sidebar of the Page Editor to save your changes.
the table editor upon selection
the Edit table icon
