If the content strategy calls for displaying groups of content on a Page or Post, a combination of Tabs and Latest Post blocks can be used to create filters.
Setting up filters is a two step process. First, you’ll need to categorize Posts into the categories you want to use as filters. Refer to the Post Category tutorial for step-by-step instructions for the first step.
Next, you’ll set up the Tabs on the Page or Post to display the categorized Posts using the Latest Post block.
How to set up your filter tabs
- In the Page or Post Editor, select the area where you want to add the filtered content
- Click the Add block (+) black square and select Tabs from the block menu
- Replace Tab title with the label of your first filter.
- Move your cursor under the red line and click on Add block (+)
- Select Latest Posts from the block menu
- Select the Post Category for the content you want to appear under this filter.
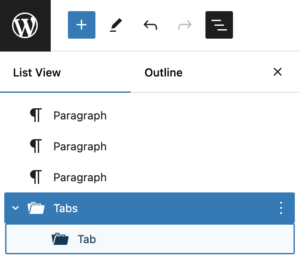
- Navigate to the top left side of the Page/Post Editor and open the Document Overview (the one that looks like stairs).
- You should see a folder icon labeled Tabs and another one nested underneath it labeled Tab. Click on the first one (Tabs) and note that a blue line appears around your first filter and the black Add Block (+) appears on the bottom right of the block.
- Click the black (+) and note that a new Tab appears.
- Repeat steps 3-6.
- Continue adding more Tabs until you have as many filters as you need.
- Click Update in the Page/Post editor to save your changes.