With patterns, you can save a block (or a group of blocks) to use later on any page or post on your site. If you’re repeatedly adding the same block or group of blocks, patterns will save you a lot of time. There are two types of patterns: Synced and Unsynced.
Synced patterns
If a Synced pattern is edited, the changes will apply to all instances where that pattern is used across the website.
How to add a synced pattern to a Page or Post
- Navigate to the page/post where you want to use a pattern and enter Edit mode.
- Select the + button at the top left hand corner of the editor to add a new block to the page/post.
- In the left-side panel of options, select the tab to the far right with a double triangle icon (on hover, it should say “Synced patterns”).
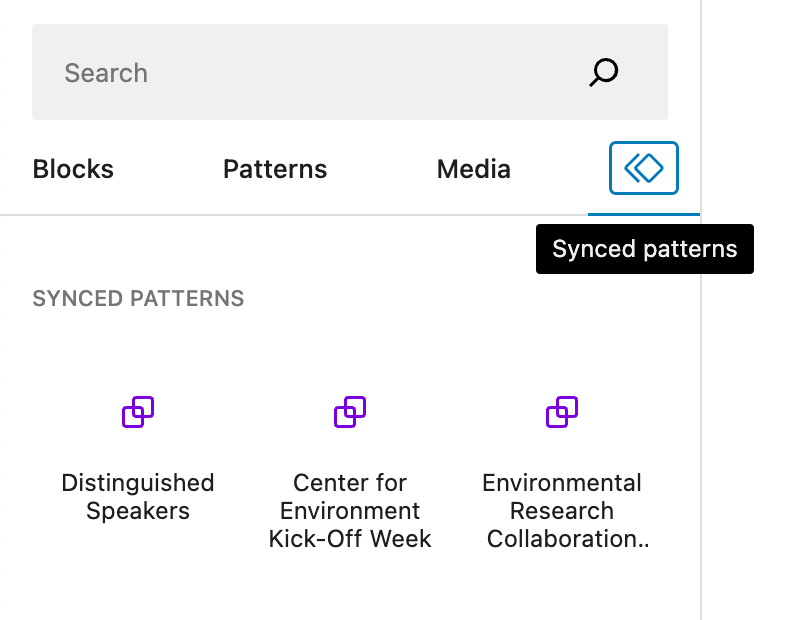
- Click on the name of one your desired pattern from the options or drag and drop it onto the page/post in the appropriate space.
- Publish your changes.
My Patterns (Unsynced)
The information in an Unsynced pattern can be edited freely without affecting the original set of blocks in the pattern or any other instances where it is used.
How to add an Unsynced pattern to a Page or Post
- In the page/post editor, select the + button at the top left hand corner of the editor to add a new block to the page/post.
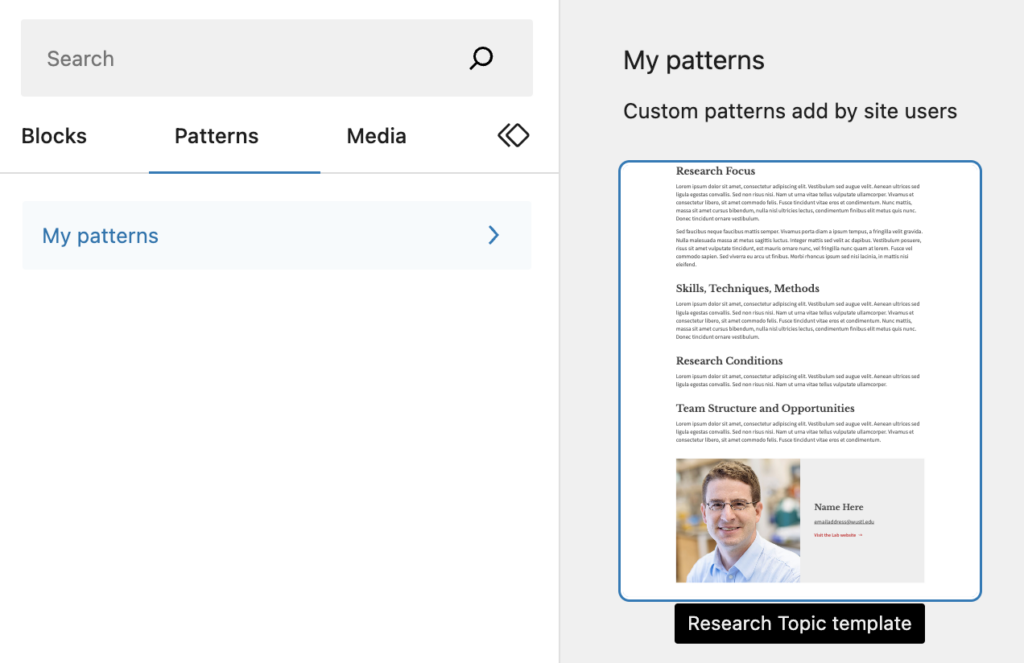
- In the left-side panel of options, select the tab labeled Patterns > My Patterns.
- Click on the name of the pattern or drag and drop it onto the page/post.
How to update the Research Topic information
- Once the Post has been created and the template applied to the content area, copy/paste descriptive text into the the existing Paragraph blocks for the details that are required.
- Research Focus
- Skills, Techniques, Methods
- Research Conditions
- Team Structure and Opportunities
- Update the information in the Researcher contact section which uses a Square photo spotlight block.
- Select the Edit media icon on the block to swap in a headshot of the researcher.
- Add the researcher’s full name into the Heading within the block.
- Update the email address and be sure that it becomes a link by pressing the Link icon when the text is selected.
- Add the name of the researcher’s lab to the Link Text field to the right where there is currently “Visit the [Name] Lab website”.
- Enter the URL to the researcher’s lab website in the Link URL field.
- Leave the Tag Text and Tag URL empty and the background selected as gray-light.